Friday, April 27, 2012

Link Love No.78!

First of all thank you all for participating, and I am so sorry about the link pictures being blurry.
We just had problems with Linkytools and it didn't work out like it supposed to. :(

But, I went through your creations, and I have my link loves for this month!

You gotta check out this cutest pair... Melly Sews created these comfortable to wear outfits by using seersucker,  at the same time the strips and the detail to the design gave them a "more than" play clothes look.  Amazing!


Un Petit Design shared a very detail oriented tutorial for this pretty tiered ruffle dress.
Have you wanted to learn how to sew zippers on the back of a dress?  Or how to add lining?  Head over to her blog to see the tutorial. :)


How about a tiered tray for your house?  Uncommon created this handsome piece out of trays she found at Hobby Lobby's clearance isle; candle holders and a little magic of spray paint.  I love the color!


When I see projects like this I wish I still had a little one, so I can play dress up!  This Hoodiesaurus idea was linked by The Pinterest Project.  Sometimes the simplest idea is the best thing, wouldn't you agree?


I think this is one of the best projects to utilize our never ending supply of scraps.  This pillow was linked by The Eternal Thread. It is simple, yet very fun and such a wonderful collection of fabrics!  Are you thinking about making a quilt like this?  I am. :)


The next link party will be on May 30th, mark your calendars everyone!   I know it is a little hard to remember the monthly party, but I will be looking forward seeing your creations. :)


Wednesday, April 25, 2012

Link Party No.78! / Blue, Silver and Green

Hi all!  It is the last Wednesday of the month, do you know what that means?  Yeah, Link Party time! As I promised last month, I am having one today, hopefully many of you remembered and link up.

Before we start the party, let me tell you how I have been lately...

I started a series of the procedures last year, and I thought to myself that I have to slow down this year(pout). Then, because of the medical insurance mess, all of a sudden I have a break from the procedures.  I was SO excited, and started accepting some projects, guest posting and more.  All of a sudden I realized that I have a tight schedule.

But, you know me, I am really thrilled to be busy that way. Just picture me in front of my sewing machine and sewing away with the biggest grin on my face.  There are many projects that I have been working on and can't reveal yet.  Please be patient my friends, some fun tutorials are coming, I promise. :)

Meanwhile, I have been having "blue, silver and green fevers” lately (whatever that means). I am drawn to those colors for some reason. Do you wanna check them out?

Silver and some blue necklace...


My new favorite earrings.  The colors reminds me of a calm and beautiful ocean.


I love sewing, but whenever I get stuck in design ideas,  I tend to escape to jewelry making.  Working on something else clears my mind.

Ok everyone, I bet you have some projects you would love to share.  I am excited to see what you have been working on!

1. Please post something YOU made. It doesn't matter if it is crochet, quilt, clothing, anything would be fine. I want to see it! If you use someone's idea or patterns please give them the rightful credit.

2. Link to your specific post, that way it is easier for everybody to find and read it.

3. Please grab the "Tea Rose Home" grab button, and link back from your post. If you can mention the party in your post or place the button on your side bar, that would be great! I want more people to have a chance to come and show off their creation.


Saturday, April 21, 2012

Tutorial / Bonnet to Headband


My sister-in-law bought a beautiful blessing dress for her baby girl and, this bonnet came with it. She wasn't too crazy about the bonnet, and she wondered if I could come up with something different using that material. Let me see what I can do...

I cut it up to see what I was dealing with and what I could do with it... Here are the possible pieces.


After thinking it over a while I knew exactly what to do. :)

1. Cut out 3" circles.


2. Use a candle to melt the edge of the circles. The secret is to run the fabric through the fire quickly, otherwise the fabric will melt too much.


3. Fold the circle twice (so, it would look like 1/4" of the circle after folding), and sew it on to the 1" felt. Repeat the process. I used solid white and sheer white fabrics, and just alternated them. If you want a fuller look of flower, you simply add more, but if you do so, the flower might look like a ball and stand out from baby's head when she wears it. It is all about what you prefer. :)


4. Sew beads in the middle of the flower.


and the back...


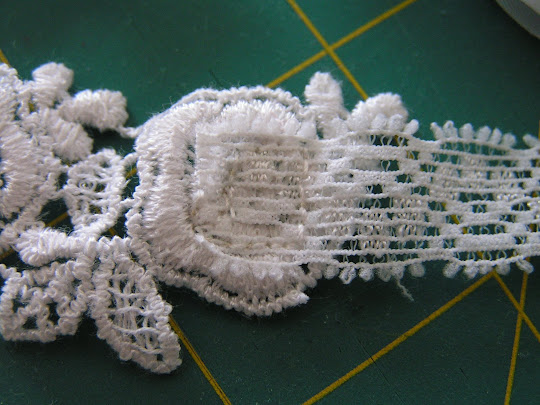
5. To make the headband, I simply measure the head of the baby with the lace, substracted 3"off the lace. Treat both ends with fray check, than sewed 2" or so long stretchy lace on both sides of the lace.


6. Decide where you want the flower to go, then, sew the flower onto the headband.


7. Done!


When she tried the headband (it was more like I made her try the headband), she surely looked cute! She is totally ready for her first big day. :)
Wednesday, April 18, 2012

Shopping with a Little Different Perspective

I have been eyeing some little girl’s striped knit dresses for the summer. Some that I saw were 40 to 50 dollars! Well, you know me; I wasn't gonna pay that much for a kid’s dress; something she might only wear for one season.

Then, one day I was at Ross (boy, I love Ross and TJ Maxx! I can find pretty darn cute stuff for killer deals) checking out the teen dress section. Look what I found...


Aren't they cute? I especially love the orange one; I think the color combinations are super. I guess they are a dress or a tunic top, either way, I loved the colors.

The light bulb moment came to me (grin)...they are too tight or too short for my liking, if my daughter is in her teens, BUT they are perfect for her 6 years old frame. AND, they were $5.99 each!

We had a small summer fashion show that afternoon, and of course, a photo shoot...


She LOVEs it!


I simply adjusted the shoulder straps, and the dresses were perfect for her. With a little bit of imagination and perspective adjustment I scored big time. :)

Sunday, April 15, 2012

Experimental Scrap Quilt

Do you remember these quilts that I shared last spring?


Well, last year before I started getting a series of procedures (so around September), I was getting antsy. I wanted many projects done and have some projects ready for me to do in bed... You know, those type of things. I pieced five quilt tops that time, and I just finished quilting one of them over the weekend.


It's rather funny looking huh? Here is the reason why... I used up all the scraps from the boy's quilt to make this. I had absolutely NO design plans whatsoever. I just kept on piecing, adding fabric here and there and if there were parts that were too long I simply cut it to match the length.

I have a love for traditional quilts, but I have been mesmerized by modern style quilts too. I wanted to see what I can come up with, with leftover fabrics. So, it was sort of an experiment.
Because it was an experimental quilt, it was also perfect for me to practice machine quilting on. I didn't have to worry about making it so perfect.


I know I still have a lot to learn, but actually machine quilting is starting to become fun. I am not so scared anymore!


There are a couple other quilts that I basted and am thinking about quilting soon. It is so hard to decide what kind of design to go with it. I can't wait to get started though. :)

Wednesday, April 11, 2012

Tutorial/How I Turned a Dollar Store Find to a Ring Display Case


I am pretty excited about this project I was just about share with you, because, I only spent $1 to buy the wood frame at the dollar store about year ago or so, and rest of the material was I already had at home and leftovers from other projects!


Even though you don't have exactly the same frame, no worries. You simply need to increase or decrease the number of "fabric spring roll" :) you put in.

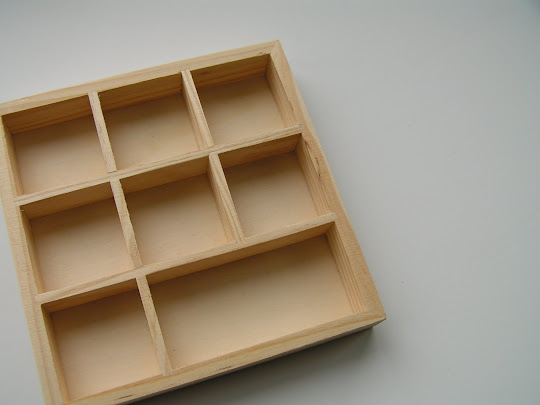
1. One dollar frame... this is the before picture that I simply spray painted it to prep for the project and set a side.


2. To make the "fabric spring roll"( just don't know the proper name for it)to slide the rings in, cut 4"x 4" squares out of linen and slightly less than 2"w X 9"L batting. In this case I cut out 27 pieces each, but this will change depends on the wood frame you have.


3. Fold the batting few times to make it look like the one in the picture and sew the end.


4. Place the folded batting onto the 4"x 4" fabric diagnally, than stard wrapping it like making a spring roll. Use pictures as a guide.


then, sew the end.


You need to make this how many ever you need, but this is like the perfect part to make it into take and go project in the zip lock bag.

5. Drizzle the glue from glue gun into the each square. Quickly put the fabric spring rolls into the square before the glue gets dry. Its best to work one square at the time.


6. Use butter knife to push in some ends that are sticking out.


You see the difference of before and after?


7. Now, it is time to enjoy.


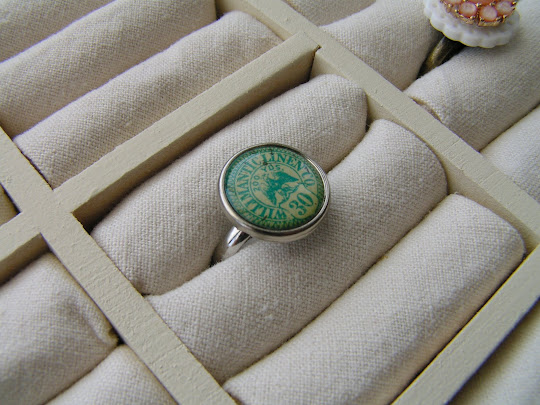
Each rings are snugly in it's place...I LOVE it.


Just like I said in earlier, you don't have to have exact same frame to make a ring display case like this. You could even use glasses, baskets, boxes, cans, I mean the possibilities to make this unique are endless. Did I make you wanna look around your house a bit to see what you can find? :)
Blog Widget by LinkWithin